概述
重装系统之后,安装了高版本的Node.js,部署时报错,于是搜索之,发现原因是hexo版本不适配,一番尝试后解决。
思路为:新建一个hexo项目,使用其配置文件,并手动安装缺失依赖。
PS:降级肯定是可以解决的,不过不够优雅(强迫症)。
手机系统升级到安卓9之后,开热点的主机IP地址是随机的。其他设备设置代理很不方便,于是考虑固定热点IP。
com.android.server.connectivity.tethering.TetherInterfaceStateMachine的getRandomWifiIPv4Address函数。
TetherInterfaceStateMachine.java#259
1 | private String getRandomWifiIPv4Address() |
由于默认的python版本为2.7,执行命令时需要改为python3,比较麻烦。所以将python3设置为默认版本。(执行apt-get install python3-pip安装python3)
原理:使用update-alternatives进行配置
1 | ls /usr/bin/python* |
一般是/usr/bin/python2和/usr/bin/python3
1 | update-alternatives --list python |
没有配置过的话会返回update-alternatives: error: no alternatives for python
通过设置优先级来实现默认使用python3
1 | sudo update-alternatives --install /usr/bin/python python /usr/bin/python2 1 |
查询默认版本号
1 | python --version |
有些脚本需要手动修改python版本(如yum),将/usr/bin/python改为/usr/bin/python2
结构体声明中加上__attribute__((packed)),可以防止编译器对结构进行字节对齐优化。
使用__attribute__((aligned(8)))(8为对齐字节数),可以强制编译器按指定字节对齐。
1 | struct AlignTest |
使用sizeof获取结构体的大小,返回7
1 | struct AlignTest |
根据结构体中最长的类型(int),进行对齐,获取到的结构体大小为8
1 | struct AlignTest |
不使用指定对齐字节时,结构体大小为3*4=12,指定后变为16
win+x, PowerShell(管理员)
1 | Install-Module posh-git -Force -SkipPublisherCheck |
win+x, PowerShell(管理员)
1 | set-ExecutionPolicy RemoteSigned |
1 | if (!(Test-Path -Path $PROFILE )) { New-Item -Type File -Path $PROFILE -Force } |
写入以下内容
1 | chcp 65001 |
注意:旧版本oh-my-posh设置主题命令为Set-Theme Paradox
全部主题见:JanDeDobbeleer/oh-my-posh/Themes
字体可以在这下载:powerline/fonts
安装for Powerline结尾的字体,以DejaVu Sans Mono for Powerline.ttf为例
右键字体文件,为所有用户安装
重新打开PowerShell,右键标题栏,在属性-字体中修改字体
PS:如果没有已安装的字体,先执行chcp 65001再试
重新打开PowerShell,观察默认字体是否发生变化
1 | Install-Module -Name PSReadLine -Force -SkipPublisherCheck |
notepad $PROFILE,添加:
1 | Set-PSReadlineOption -EditMode Emacs |
双击Tab会出现智能提示: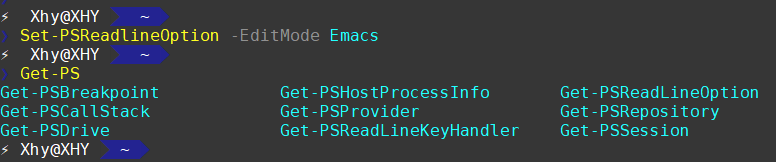
参考:PSReadLine让PowerShell控制台高亮起来
注意:配置后将导致无法执行bat脚本
win+r,regedit
定位到计算机\HKEY_CURRENT_USER\Console\%SystemRoot%_system32_cmd.exe
修改CodePage字段为65001(10进制)
之后启动cmd即可切换字体
Powershell 主题美化学习过程
超酷的 PowerShell 美化指南
Windows Terminal + oh-my-posh模块美化官方教程集锦以及常见问题(问题收集中)
在WSL2(Ubuntu 18.04)中安装docker并配置自启动
使用阿里云的加速服务,解决下载镜像速度慢的问题
打开容器镜像服务
镜像中心 - 镜像加速器
将加速器地址写入/etc/docker/daemon.json,格式为:
1 | { |
重启docker
1 | sudo service docker restart |